
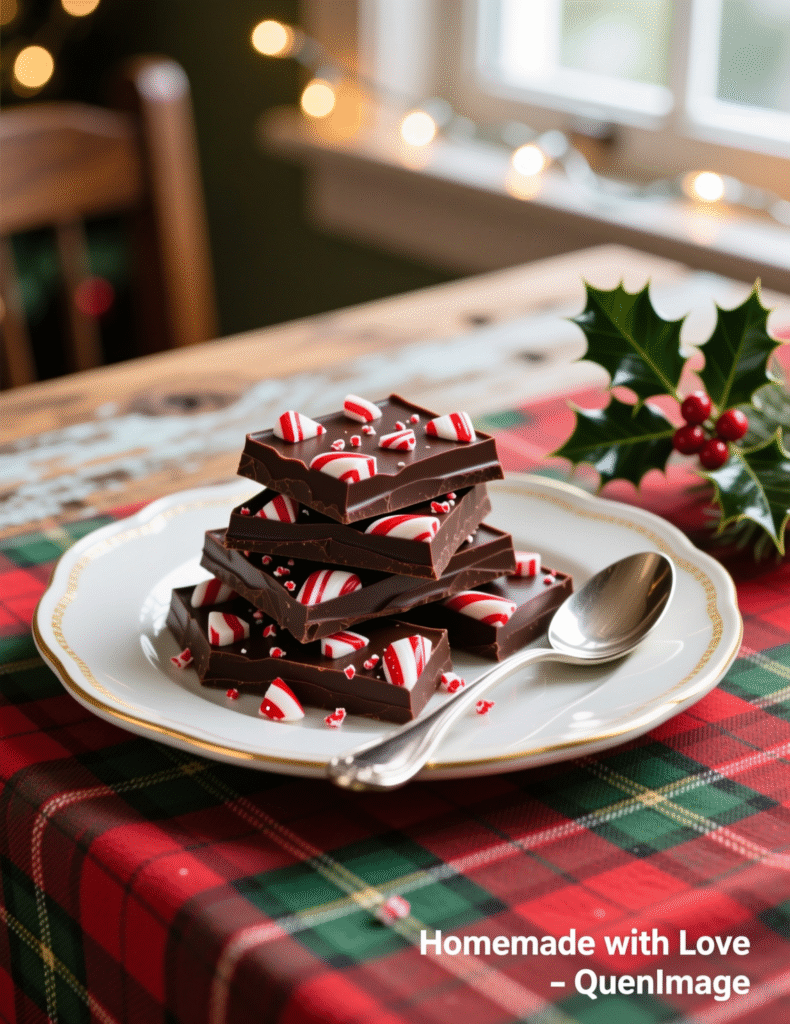
Some desserts just whisper holidays before you even taste them. Peppermint bark does that — loud and clear. One look at that shiny chocolate layer, the snowy white top, and those crushed candy cane bits scattered like confetti, and suddenly it’s December, no matter what month it is. Making peppermint bark at home isn’t just easy, it’s almost too easy. But here’s the trick — the difference between good bark and perfect bark hides in tiny details most people skip.
Let’s dive into how to make peppermint bark like a pro — the texture that snaps clean, the flavor that balances sweetness with minty freshness, and the technique that gives you that glossy finish chocolate makers chase.
Why Peppermint Bark Works So Well
This dessert’s magic lies in contrast. You’ve got dark or semisweet chocolate — deep, rich, slightly bitter. Then a layer of white chocolate — sweet, creamy, mellow. Add the peppermint crunch and it’s a symphony. The key? Balance. Too much white chocolate, and it’s cloying. Too much peppermint, and it tastes like toothpaste. Professionals know to keep proportions tight and layers thin — elegance over excess.
It’s a dessert that feels indulgent yet simple, fancy yet homey. That’s probably why big brands like Williams Sonoma charge quite a lot for it — yet, truth be told, you can make a version just as luxurious in your own kitchen for a fraction of the cost.
The Essential Ingredients
Here’s what you’ll need for 12 servings (and yes, they’ll disappear fast):
- 12 oz (about 340g) high-quality semisweet or dark chocolate (60–70% cocoa)
- 12 oz (about 340g) premium white chocolate (with real cocoa butter, not coating)
- ½ teaspoon peppermint extract (pure, not imitation)
- 4–5 regular-sized candy canes (or about ½ cup crushed peppermint candies)
- A pinch of sea salt (optional, but it brings out depth)
The ingredients list looks simple, but don’t let that fool you. In professional kitchens, success in recipes like this hinges on the quality of the chocolate. A cheap bar will give you a waxy finish and uneven melt. Real white chocolate, made with cocoa butter, melts smoothly and holds its shine — that’s what you’re after.

Step-by-Step: The Expert Way
1. Prepare the Surface
Line a baking sheet (9×13 inch works fine) with parchment paper. Keep it flat and smooth — any wrinkle will transfer right onto your bark’s bottom layer. Some pros use acetate sheets instead of parchment; it gives a more polished, glossy surface.
2. Melt the Dark Chocolate
You can use a double boiler or a microwave (in 20-second bursts). Stir after each heating. Aim for just melted — around 115°F (46°C). Overheating kills the temper, leaving dull, streaky bark.
Pour the melted chocolate onto your parchment-lined tray. Spread it evenly with an offset spatula, about ⅛ inch thick. Tap the tray gently to remove air bubbles. Slide it into the fridge for about 10 minutes — just until it firms up slightly, not hard.
3. Melt the White Chocolate
White chocolate’s fussier. It scorches if you blink wrong. Keep it around 105°F (40°C). Once melted, stir in peppermint extract and a pinch of salt if using. Stir gently but constantly — white chocolate seizes easily with moisture or high heat.
4. Layer Like a Pro
Before spreading the white chocolate, make sure your dark chocolate layer is set but not rock-solid. If it’s too cold, the layers won’t bond; they’ll separate when broken. Pour the white chocolate on top, spread gently to cover the dark layer.
Now’s the fun part — sprinkle crushed candy canes over while the top is still wet. Press them lightly so they stick but don’t sink.
5. Cool and Break
Chill the bark for 20–25 minutes, until fully set. Don’t rush it with the freezer; fast cooling can cause condensation, and that leads to sugar bloom — those dull white streaks pros hate.
Once set, lift the parchment and break the bark into irregular pieces. The irregularity is part of its charm — no two bites should look identical.
Expert-Level Insights Most Home Recipes Miss
Peppermint bark sounds simple — melt, layer, chill. But true craftsmanship is hidden in the details.
Tempering matters.
Tempering chocolate gives it that sharp snap, glossy finish, and resistance to melting at room temperature. If you skip it, your bark may taste fine but look dull and sticky. Even a basic seed-tempering method makes a difference.
Humidity is your enemy.
Water ruins chocolate texture. Always dry your tools completely before starting. Even a drop of moisture can cause “seizing” — when the chocolate turns grainy and thick like wet sand.
Use pure peppermint extract, not mint.
Mint extract often blends spearmint and peppermint, giving a toothpaste-like aftertaste. You want the clean, crisp punch of pure peppermint oil.
White chocolate quality changes everything.
Most “white baking chips” in grocery aisles don’t actually contain cocoa butter — they’re made from palm oil or milk solids. They won’t melt right or taste authentic. Look for labels listing cocoa butter as the first or second ingredient.
The Science Behind the Snap
Chocolate structure is crystalline — specifically, cocoa butter can form six types of crystals, but only one, called Form V, gives that professional sheen and satisfying snap. Achieving that crystal structure is why tempering works. It sounds fussy, but the payoff is visible and audible.
When done right, your peppermint bark will break with a crisp click and melt smoothly on the tongue — no waxy residue, no crumbling. That’s when you know you’ve nailed it.
Flavor Variations for the Curious Baker
Once you’ve mastered the basic bark, there’s a whole world to explore.
- Espresso Peppermint Bark – Stir ½ teaspoon espresso powder into the dark chocolate before layering. The coffee deepens the cocoa notes and cuts the sweetness beautifully.
- Marbled Peppermint Bark – Swirl the white and dark chocolate together instead of layering. Use a toothpick to create elegant marbling.
- Triple Chocolate Bark – Add a milk chocolate layer in between. It’s decadent, almost truffle-like.
- Vegan Version – Use vegan chocolate with cocoa butter and dairy-free peppermint candy. Coconut-based white chocolate substitutes work surprisingly well.
Storing and Shelf Life
If you temper properly, peppermint bark can last 2 to 3 weeks at room temperature, stored in an airtight container. Keep it in a cool, dry place (65–70°F). Refrigeration can introduce moisture and dullness, though if your kitchen’s warm, store it in the fridge wrapped tightly in wax paper.
Freeze only if you must, and always bring it back to room temperature before opening the container — that prevents condensation from forming on the surface.
The Business of Peppermint Bark
Here’s something many don’t realize — peppermint bark is a billion-dollar seasonal product. Williams Sonoma alone sells tons of it every holiday season, often priced upwards of $30 per pound. Why? Presentation, perceived luxury, and brand nostalgia.
Homemade bark can rival those versions easily if made with care and good chocolate. It’s even become a small business opportunity for cottage bakers. Packaging it in clear cellophane bags with red ribbons? Instant holiday magic.
If you’re making it for gifting or selling, tempering is non-negotiable. It’ll keep the bark beautiful for weeks, even during shipping.
Troubleshooting Common Problems
The bark separated when I broke it.
Your layers didn’t bond. Next time, don’t chill the bottom layer too hard before adding the top one. Aim for “soft set.”
My white chocolate turned grainy.
That’s overheating or contact with water. Melt slower, stir constantly, and use dry utensils.
It looks dull, not shiny.
Lack of temper or moisture exposure. If it’s just for home snacking, no biggie. But for gifting? Temper next time.
The candy canes bled red streaks into the chocolate.
That happens when they sit too long before cooling. Sprinkle fast and chill immediately after.
Fun Fact: The Bark Name Isn’t Random
The term “bark” comes from the rough, uneven texture when broken apart — like tree bark. The name first appeared in American cookbooks in the early 20th century. Peppermint bark itself became iconic around the mid-1990s, when commercial brands began mass-producing it for holiday markets.
Today, it’s practically a Christmas symbol — edible nostalgia wrapped in sweetness and crunch.
Nutrition (Per Serving, Approximate)
- Calories: 260
- Fat: 15g
- Carbohydrates: 28g
- Sugar: 26g
- Protein: 2g
- Sodium: 35mg
It’s dessert — don’t overthink it. Eat one piece, maybe two, and let it taste like joy.
A Professional’s Touch: Presentation Matters
Even pros know appearance sells flavor. To elevate presentation:
- Break into uniform-ish rectangles instead of random shards for a more refined look.
- Drizzle dark chocolate over the finished bark before it sets completely for contrast.
- Add edible glitter or crushed freeze-dried raspberries for a gourmet twist.
Tiny touches make homemade bark look boutique-level.
Wrapping It Up — Literally
Easy Homemade Peppermint Bark isn’t just candy. It’s a craft — a practice in texture, temperature, and timing. When you get it right, it’s glossy, snappy, cool on the tongue, and warm in the heart.
Whether you’re making a single batch for friends or a dozen trays for holiday sales, remember: good bark comes from good chocolate, steady hands, and patience that lasts just long enough to let the layers set properly.
And when you finally crack that first piece and hear the snap? That’s your confirmation — you’ve done it just right.
FAQs
How long does homemade peppermint bark last?
It lasts up to 2–3 weeks at room temperature when stored in an airtight container.
Can I freeze peppermint bark?
Yes, you can, but let it return to room temperature before unsealing to avoid condensation.
Why did my peppermint bark separate into layers?
It means the bottom chocolate layer hardened too much before adding the white layer.
How do I keep my chocolate shiny and smooth?
Properly tempering the chocolate helps achieve that glossy, professional finish.
Can I use chocolate chips instead of bars?
You can, but bars melt and temper more smoothly for better texture and flavor.
What type of peppermint extract should I use?
Always use pure peppermint extract, not mint extract, for the best flavor.
How do I prevent white chocolate from seizing?
Melt it slowly, stir often, and make sure no moisture touches it.
Why did my candy cane topping melt or bleed?
It happens when candy sits too long before chilling — sprinkle fast and refrigerate immediately.
Is peppermint bark gluten-free?
Yes, if your chocolate and candy canes are certified gluten-free.
Can I make vegan peppermint bark?
Absolutely — just use vegan chocolate with cocoa butter and dairy-free candy canes.
How thick should peppermint bark be?
Aim for around ¼ inch total thickness for the perfect bite and snap.
Can I add other flavors or toppings?
Yes, try espresso powder, sea salt, or crushed cookies for creative variations.
What causes white streaks on my bark?
That’s sugar or fat bloom from moisture or untempered chocolate.
Should peppermint bark be stored in the fridge?
Only if your kitchen’s warm; otherwise, room temperature is ideal.
Why is my bark dull instead of glossy?
It’s likely the chocolate wasn’t tempered or cooled too quickly.

Marie Smith is a passionate recipe blogger, sharing easy, delicious, and creative culinary ideas that inspire home cooks to elevate everyday meals with flavor and simplicity.
